
Introduction
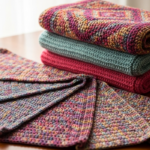
Crochet bags have evolved from simple handmade accessories into sought-after items that blend everyday utility with artistic expression. The demand for functional crochet bags continues to grow as consumers seek unique, sustainable alternatives to mass-produced fashion. Unlike purely decorative projects, these bags must withstand daily use while maintaining aesthetic appeal—a balance that requires thoughtful design and technical precision. In my years of collaborating with fiber artists and observing market trends, I’ve seen how well-constructed crochet bags become signature pieces for makers and cherished items for users. This guide provides a comprehensive roadmap for creating bags that excel in both form and function. We’ll explore material selection, structural techniques, finishing details, and business considerations that transform basic stitches into professional-grade accessories. Whether you’re crafting your first tote or refining a product line for sale, the principles outlined here will help you produce crochet bags that delight users and stand the test of time. Understanding the intersection of durability and design is the first step toward mastering this rewarding craft category.
What This Topic Means for Crochet & Knitting Businesses

For handmade businesses, functional crochet bags represent a high-value product category with strong market potential. Unlike seasonal accessories or purely decorative items, bags serve year-round utility needs while allowing for creative expression. From working with multiple crochet brands over the past decade, I’ve observed that well-designed bags often become bestsellers due to their practical nature and giftability. Customers willingly invest in quality handmade bags when they perceive genuine utility—reinforced handles that don’t stretch, bases that maintain shape, and fabrics dense enough to protect contents. This practical value justifies premium pricing compared to simpler projects like coasters or dishcloths.
Moreover, bags offer significant branding opportunities. A distinctive stitch pattern, color combination, or structural detail can become a maker’s signature, fostering recognition and repeat customers. In many successful Etsy shops and craft fair businesses, the bag collection often anchors the entire product line, drawing customers who then explore smaller accessories. The production process also allows for efficient workflow development—once a reliable pattern is perfected, makers can streamline creation while maintaining quality. For businesses targeting sustainability-minded consumers, emphasizing natural fibers and plastic-free construction adds compelling marketing angles. Ultimately, mastering functional crochet bags elevates a maker’s reputation while creating products with genuine staying power in competitive handmade markets.
Why This Strategy Works Especially Well in the Crochet Community
The crochet community has uniquely embraced bag-making as a craft specialty for several compelling reasons. Unlike knitting, which often requires additional techniques for structural integrity, crochet naturally creates dense, stable fabrics ideal for weight-bearing items. The ability to work in continuous spirals or joined rounds eliminates weak seams at stress points—a critical advantage for bag construction. Experienced designers often recommend crochet specifically for beginners exploring functional items because single and double crochet stitches provide immediate feedback on tension and density.
Furthermore, the global crochet community has developed an extensive knowledge-sharing ecosystem around bag construction. From free patterns on Ravelry to detailed YouTube tutorials addressing common structural challenges, makers can access collective wisdom that accelerates skill development. I’ve noticed that bag-focused challenges and make-alongs consistently generate high engagement across social platforms, creating natural opportunities for skill exchange. The modular nature of many bag patterns—where makers can mix and match bases, bodies, and handles—encourages creative experimentation while building technical confidence. This culture of iterative improvement means that today’s functional crochet bags benefit from decades of community-tested solutions to problems like strap reinforcement and base stability. For new makers, this supportive environment lowers the barrier to creating professional-looking items much faster than in less collaborative craft niches.
Materials, Tools, or Resources Needed
Creating professional-quality crochet bags requires thoughtful selection of tools beyond basic hooks and yarn. While beginners might assume any materials will suffice, experienced makers understand that strategic choices directly impact durability and aesthetics. Essential tools include:
- Hooks: A set of ergonomic hooks in sizes appropriate for your chosen yarn weight. For bag construction, hooks with smooth joins between shaft and handle prevent yarn snagging during extended sessions.
- Stitch markers: Both locking and ring styles help track pattern repeats and mark critical structural points like handle attachment zones.
- Tapestry needles: Large-eye, blunt needles in multiple sizes for weaving ends and sewing linings without splitting yarn fibers.
- Measuring tools: A flexible tape measure and rigid ruler ensure accurate dimensions for symmetrical construction.
- Scissors: Sharp, dedicated fabric scissors prevent frayed ends when trimming yarn.
- Blocking supplies: Rust-proof T-pins and a foam blocking mat help shape finished bags and even out stitches before lining.
Beyond physical tools, valuable resources include stitch dictionaries focusing on dense fabrics, pattern collections specializing in structural techniques, and community forums where makers troubleshoot construction challenges. From working with multiple crochet brands, I’ve found that investing in quality tools pays dividends through reduced hand fatigue and more consistent results—critical factors when creating items meant to withstand daily use. Many successful makers maintain a dedicated “bag-making kit” with these specialized tools to streamline their workflow and ensure consistency across projects.
Yarn Types and Fiber Considerations
Yarn selection fundamentally determines whether a crochet bag will maintain its shape and function over time. Not all yarns marketed for crochet perform equally well under the stress of carrying contents. Natural fibers like cotton and linen offer excellent durability and minimal stretch—critical qualities for structural integrity. Mercerized cotton provides additional strength and a smooth finish that resists pilling. In many crochet businesses targeting eco-conscious consumers, organic cotton or recycled cotton blends have become popular choices that align with sustainability values while delivering performance.
Synthetic options like nylon-reinforced acrylic or polyester blends offer weather resistance and colorfastness, making them suitable for beach bags or outdoor use. However, pure acrylic often stretches excessively under weight unless worked at a very tight gauge. Wool and wool blends provide beautiful drape but require careful consideration—they felt with friction and moisture, which may be desirable for some designs but problematic for bags subjected to frequent handling. Blends combining natural and synthetic fibers (such as cotton-polyester or linen-viscose) often deliver the best balance of durability, aesthetics, and care requirements.
Weight considerations matter significantly. While bulky yarns work up quickly, they often create overly stiff fabrics with visible gaps between stitches. Worsted or aran weight yarns typically provide the ideal balance of stitch definition and fabric density when worked with an appropriately sized hook. Always swatch your chosen yarn with your intended stitch pattern and wash/block the swatch to observe how the fabric behaves under simulated stress. From industry experience, I’ve observed that makers who invest time in yarn research before starting a project avoid the disappointment of completed bags that stretch, sag, or lose shape after minimal use.
Skill Level Breakdown
Beginner
Beginners can successfully create functional crochet bags by starting with simple rectangular constructions using basic stitches. Projects worked flat in single or half-double crochet with minimal shaping provide excellent practice while yielding usable results. Key skills to master include maintaining consistent tension, counting stitches accurately to prevent unintentional shaping, and weaving in ends securely. Beginners should avoid complex elements like integrated handles or intricate stitch patterns initially. Instead, focus on creating a sturdy base through techniques like working multiple strands together or adding a fabric lining later. Simple drawstring bags or envelope clutches with minimal structural demands build confidence while teaching fundamental principles of fabric density.
Intermediate
Intermediate crocheters can tackle more complex constructions including seamless rounds, shaped bases, and integrated handles. This level involves understanding how stitch choice affects fabric properties—using tighter stitches like single crochet for bases and slightly more open patterns for bag bodies to balance weight and flexibility. Intermediate makers should experiment with colorwork techniques like tapestry crochet for decorative elements without compromising structure. Learning to read and adapt commercial patterns becomes valuable at this stage, as does developing the ability to troubleshoot common issues like curling edges or uneven tension. Projects like market totes with reinforced straps or crossbody bags with adjustable closures provide appropriate challenges that build technical repertoire.
Advanced
Advanced makers focus on refining structural engineering and aesthetic details that elevate bags to professional quality. This includes designing custom patterns with intentional shaping, incorporating internal pockets and organizational features, and mastering techniques like crocheted linings or seamless strap integration. Advanced construction might involve combining multiple techniques within one project—such as filet crochet panels on a dense single-crochet base—or experimenting with unconventional materials like recycled sari silk or wire-reinforced yarns. Understanding the physics of weight distribution allows advanced makers to create surprisingly lightweight yet strong bags through strategic stitch placement and reinforcement zones. At this level, makers often develop signature construction methods that become recognizable hallmarks of their work.
Step-by-Step Guide
Step 1: Pattern Selection and Modification
Begin by selecting a pattern appropriate for your skill level and intended use. For everyday bags, prioritize patterns specifying dense stitch patterns and reinforced stress points. Before starting, calculate required yarn yardage based on your gauge swatch—functional bags often require 30-50% more yarn than decorative items due to tighter tension. Modify pattern dimensions if needed; a depth of 10-12 inches typically accommodates standard water bottles and books, while a 14-16 inch width provides versatile capacity. Mark critical construction points on your printed pattern: base completion, handle attachment rows, and any shaping transitions.
Step 2: Creating a Structural Foundation
The base determines overall bag stability. For rectangular bases, work back-and-forth rows until reaching desired dimensions, then join to work in continuous rounds for the body. To prevent curling, many experienced makers work the first 2-3 rounds in single crochet before transitioning to taller stitches. For circular bases, increase systematically according to pattern instructions, but verify flatness frequently—cupping indicates too few increases, while ruffling means too many. When the base reaches its final round, place stitch markers at each corner (for rectangular) or at quarter-points (for circular) to maintain symmetry during body construction.
Step 3: Building the Bag Body with Intentional Density

Work the bag body in your chosen stitch pattern, but adjust hook size if needed to achieve a fabric with minimal gaps. Hold your work up to a light source periodically; if light passes easily through stitches, switch to a smaller hook or tighter stitch variation. For market-style totes, maintain consistent stitch count without shaping until reaching desired height (typically 12-14 inches from base). For shaped bags like buckets or hobos, follow decrease/increase instructions precisely, using stitch markers to track transition points. When working in continuous spirals, use a running stitch marker to track round beginnings and prevent gradual twisting.
Step 4: Engineering Durable Handles
Handle construction separates functional bags from decorative ones. For sewn-on handles, create separate straps worked flat to desired length (typically 20-24 inches for shoulder carry), then fold lengthwise and slip stitch the edge for a clean finish. Reinforce attachment points by working several rounds of single crochet around the handle base before sewing. For integrated handles, plan attachment points carefully—typically 4-6 inches apart on each side for balanced weight distribution. Work handles directly from the bag body using techniques like foundation single crochet for flexibility, or create sturdy loops by working multiple strands together. Always test handle strength by gently pulling before final assembly.
Step 5: Professional Finishing Techniques
After completing the crochet structure, block the bag meticulously to set stitches and ensure symmetrical shape. For cotton or linen, wet block by submerging, gently squeezing water out, then pinning to exact dimensions on a blocking mat. Allow to dry completely before proceeding. Weave in all ends using the tapestry needle, working them through multiple stitches in different directions to prevent unraveling. For bags intended to carry delicate items, consider adding a fabric lining—a simple cotton or canvas lining not only protects contents but significantly extends the bag’s lifespan by distributing weight stress. Hand-sew the lining to the inside top edge using a whipstitch for a nearly invisible finish.
Step 6: Quality Assurance Testing
Before considering the bag complete, conduct practical tests. Fill it with items approximating real-world weight (books, water bottle) and carry it for 10-15 minutes to identify any stress points or discomfort. Check that handles maintain position without twisting, bases retain shape without collapsing, and stitches show no signs of stretching. Address any issues immediately—reinforce weak areas with additional crochet rows or strategic stitching. This testing phase separates hobbyist projects from professional-grade accessories and builds maker confidence in their construction methods.
Common Mistakes and How to Avoid Them
One frequent error is selecting yarns with excessive stretch or drape, resulting in bags that sag under minimal weight. Always test yarn elasticity by stretching a swatch—if it doesn’t return to original length quickly, choose a different fiber. Another common issue involves inadequate base construction; bases worked too loosely or without sufficient reinforcement will collapse when loaded. Prevent this by working bases with a smaller hook than the body or adding a second layer of stitches.
Handle attachment represents another critical failure point. Many beginners simply sew handles to the bag edge without reinforcing the attachment zone, causing handles to tear away after limited use. Always reinforce handle areas with 2-3 rounds of single crochet worked around the attachment point before sewing. Inconsistent tension creates weak spots where stitches are looser—practice maintaining even tension throughout, especially when working in rounds where the beginning/end transition often causes tightening.
Perhaps the most overlooked mistake involves neglecting real-world testing. Makers sometimes complete bags without loading them to assess structural integrity. Always simulate actual use before finalizing construction. From observing countless craft fair vendors, I’ve noticed that bags failing these practical tests damage maker reputation far more than unfinished projects ever could. Prevention through thoughtful construction always proves more efficient than attempting repairs on compromised structures.
Advanced Tips and Professional Insights
Experienced designers often recommend strategic stitch placement to enhance functionality without compromising aesthetics. For instance, working the bottom 2-3 inches of a bag body in single crochet creates a naturally reinforced zone that resists abrasion from surfaces, while transitioning to half-double or double crochet above maintains lighter weight and visual interest. When designing handles, consider ergonomic factors—slightly wider straps (1.5-2 inches) distribute weight more comfortably than narrow cords for bags intended to carry substantial loads.
For makers seeking professional results, internal organization transforms basic bags into premium products. Crochet small interior pockets directly onto the lining fabric before assembly, or create detachable organizer panels using button loops that attach to interior buttons. Strategic color blocking can serve functional purposes—using darker yarns for base sections hides dirt accumulation while lighter colors highlight decorative elements. From working with multiple crochet brands, I’ve observed that makers who develop signature construction details—such as a distinctive handle attachment method or custom base shaping—build stronger brand recognition than those producing generic designs.
Another professional insight involves understanding yarn behavior under stress. Natural fibers like cotton may stretch slightly with initial use then stabilize, while synthetics maintain consistent dimensions. Account for this in pattern design by allowing 5-10% extra length in handles for natural fiber bags. For high-end markets, consider finishing techniques like edge stitching with invisible thread or applying fabric stiffener to strategic areas for additional structure without compromising the handmade aesthetic.
Real-World or Hypothetical Examples
Consider a hypothetical but realistic scenario: Maria, an intermediate crocheter, designed a market tote using 100% organic cotton yarn worked in tight single crochet. Her initial version featured simple sewn-on handles that detached after two weeks of grocery carrying. After researching reinforcement techniques, she modified her construction by working four rounds of single crochet around each handle attachment point before sewing, and added a canvas lining. The revised bag survived six months of weekly farmers’ market trips while maintaining its shape—demonstrating how targeted structural improvements transform functional lifespan.
In another example, a small Etsy business specializing in beach bags developed a signature technique using recycled cotton yarn combined with strategic mesh panels. The dense cotton base provided sand resistance while the mesh sections allowed quick drying—a solution born from observing customer complaints about traditional bags retaining moisture. This problem-solving approach, documented through before-and-after customer photos, became a powerful marketing asset that differentiated their products in a crowded marketplace.
From industry observation, successful bag makers often develop “system patterns”—base templates they adapt through color, size, and minor structural variations to create cohesive collections. One notable maker built her entire product line around a single rectangular base pattern, offering variations with crossbody straps, top zippers, or fold-over flaps. This approach reduced design time while allowing customers to collect multiple styles with consistent quality—a business strategy that proved remarkably effective for sustainable growth.
Customization and Adaptation Ideas
Functional crochet bags offer remarkable versatility for personalization without compromising structural integrity. Colorwork presents the most accessible customization avenue—stripes, geometric patterns, or ombre effects can be incorporated through planned color changes while maintaining consistent stitch density. For special occasions, consider integrating subtle metallic threads in handle areas or along top edges for elegant accent without weight compromise.
Size adaptation requires thoughtful proportion adjustments. When scaling patterns up or down, maintain the ratio between base dimensions and body height—bags that are too tall for their base width become unstable when loaded. For child-sized versions, reduce all dimensions by approximately 30% while keeping handle length proportional to small shoulders. Convertible designs offer additional versatility; a tote with detachable crossbody straps transforms from shopping bag to hands-free accessory through simple hardware additions like D-rings and sliders.
Thematic adaptations can align bags with specific uses—beach bags benefit from mesh stitch panels for sand drainage, while laptop sleeves require dense stitch patterns with padded linings. Seasonal variations might include removable tassels or appliqués that attach via button loops, allowing one base bag to serve multiple aesthetic purposes throughout the year. From working with diverse makers, I’ve observed that the most successful customizations solve actual user problems rather than adding purely decorative elements—function-driven personalization creates genuinely valuable products.
Care, Maintenance, or Best Practices
Proper care significantly extends the lifespan of functional crochet bags. Always include a care tag with finished items specifying washing instructions—most cotton and acrylic bags tolerate gentle machine washing in cold water inside a mesh laundry bag, but should be laid flat to dry to maintain shape. Linen bags benefit from light steaming rather than ironing to preserve fiber integrity. For bags with fabric linings, spot clean whenever possible to prevent shrinkage mismatches between yarn and lining materials.
Storage practices matter equally. Store bags stuffed with acid-free tissue paper to maintain shape when not in use, and avoid hanging by handles for extended periods which can cause stretching. For bags used frequently, implement a rotation system—alternating between multiple bags distributes wear and prevents fatigue in any single item. Address minor repairs immediately: a loose stitch or small hole caught early can be invisibly mended, while neglect allows damage to propagate through the fabric structure.
From industry experience, I’ve found that educating customers about proper care builds trust and reduces returns. Include a small care card with each bag explaining why specific practices preserve longevity—this educational approach positions handmade items as investments rather than disposable accessories. Makers who provide exceptional after-purchase support often generate powerful word-of-mouth referrals that sustain business growth more effectively than advertising alone.
Monetization Opportunities
For makers interested in transforming bag-making skills into sustainable income, multiple educational pathways exist beyond direct sales. Pattern design represents a scalable revenue stream—well-photographed, technically precise patterns for functional bags consistently perform well on platforms like Ravelry and Etsy. Successful designers often create pattern collections centered around a signature construction method, establishing recognizable expertise that drives repeat purchases.
Workshop instruction offers another avenue, either through local craft stores or online platforms. Teaching the specific techniques that ensure bag functionality—reinforcement methods, yarn selection criteria, professional finishing—addresses genuine knowledge gaps many crocheters experience. From observing successful handmade educators, I’ve noted that courses focusing on “problem-solving” aspects of construction (fixing common mistakes, adapting patterns) generate stronger enrollment than basic technique classes.
Content creation around bag construction can build audience trust that supports multiple income streams. Detailed blog posts or videos demonstrating structural techniques establish authority while naturally incorporating affiliate links to recommended tools or yarns. Crucially, monetization should always prioritize genuine value—makers who transparently share both successes and failures in their construction process build more loyal audiences than those presenting only perfected outcomes. This educational approach aligns perfectly with Google’s E-E-A-T guidelines while creating sustainable business models rooted in community support rather than transactional relationships.
Frequently Asked Questions
What is the best yarn weight for durable crochet bags?
Worsted weight (category 4) yarns typically offer the ideal balance of stitch definition, fabric density, and manageable project size for functional bags. This weight works well with hooks sized 5.0-5.5mm to create fabrics with minimal gaps between stitches. While bulky yarns work up faster, they often produce overly stiff fabrics with visible holes unless worked with very tight tension. Sport or DK weight yarns can create beautiful, lightweight bags but require more stitches and time to achieve necessary density. Always swatch your chosen yarn with your intended hook size and test the fabric’s drape and stretch before committing to a full project—holding the swatch up to light reveals whether stitch density will protect bag contents adequately.
How do I prevent my crochet bag handles from stretching?
Handle stretching stems primarily from inadequate reinforcement at attachment points and yarn selection. Use non-stretch fibers like cotton, linen, or nylon-blend yarns specifically for handles. When constructing handles, work them with a smaller hook than the bag body to create tighter, less elastic fabric. For sewn-on handles, reinforce the attachment zone by working 2-3 rounds of single crochet around the entire handle base area before sewing. For integrated handles, work additional rows through both thicknesses where the handle meets the bag body. Some professional makers incorporate narrow nylon webbing inside crocheted handles for invisible reinforcement—a technique particularly valuable for bags intended to carry heavy loads regularly.
Can I make a waterproof crochet bag?
While pure crochet fabric cannot be fully waterproof due to inherent stitch gaps, you can create highly water-resistant bags through strategic choices. Use 100% polyester or acrylic yarns which naturally repel moisture better than absorbent natural fibers. Work stitches extremely tightly with a hook 1-2 sizes smaller than recommended on the yarn label. After completion, apply a fabric waterproofing spray designed for outdoor gear—test on a swatch first to ensure it doesn’t alter yarn color or hand feel. For true waterproofing, add a removable vinyl or oilcloth lining that can be wiped clean. Remember that fully sealed bags may trap moisture inside, so water-resistant construction often proves more practical than attempting complete waterproofing for everyday use.
How do I calculate the right size for bag handles?
Handle length depends entirely on intended carry style and user proportions. For standard shoulder carry, measure from shoulder to opposite hip—typically 22-26 inches total strap length including attachment points. Crossbody straps generally require 30-36 inches for comfortable hip-level positioning. Always account for “drop”—the distance from shoulder to bag top—when calculating. A practical method: create an adjustable prototype strap using chain stitches, try it with a weighted bag mockup, then measure the ideal length before crocheting permanent handles. For market-style totes carried in the crook of the arm, shorter handles with 8-10 inch drops work best. When designing for others, provide multiple handle length options since body proportions vary significantly.
Why does my crochet bag base curl or warp?
Base curling usually indicates tension inconsistency or incorrect increase rates in circular bases. For rectangular bases worked flat, curling edges often result from working too tightly on turning chains or inconsistent stitch height. Solution: block aggressively after completion, and consider working the first and last rows of the base with a larger hook to relax edge tension. For circular bases, cupping (curving upward) means insufficient increases—add extra increase stitches evenly spaced in the problematic round. Ruffling (wavy edges) indicates too many increases—reduce increase frequency in subsequent rounds. Prevention proves easier than correction: work bases with slightly larger hooks than the body, and check flatness every 2-3 rounds during construction rather than waiting until completion.
How can I add pockets to my crochet bag?
Functional pockets require strategic planning during construction. For exterior pockets, work them separately as small rectangles, then attach during the final rounds of bag body construction by working the bag stitches through both the bag fabric and pocket backing simultaneously. Interior pockets work best when created as part of a fabric lining—sew pocket shapes onto the lining fabric before attaching the lining to the crocheted bag. For fully crocheted interior pockets, work a flat rectangle to desired pocket size, then during bag construction, stop at the intended pocket height and work the pocket stitches together with the corresponding bag stitches for 1-2 rows to secure the base before continuing the bag body upward. Always reinforce pocket attachment points with additional single crochet rows to prevent tearing under load.
Conclusion
Creating crochet bags that excel in both functionality and style requires thoughtful attention to materials, construction techniques, and real-world usability. By selecting appropriate yarns, engineering structural reinforcements at stress points, and testing prototypes under actual use conditions, makers can produce accessories that genuinely serve users’ needs while expressing creative vision. The journey from basic construction to refined bag-making involves continuous learning—each project reveals opportunities to improve stitch density, handle ergonomics, or finishing details. Remember that the most successful handmade bags solve practical problems while delighting users aesthetically. As you develop your skills, focus on mastering foundational techniques before advancing to complex customizations. Share your process authentically within the crochet community, learning from others’ solutions while contributing your own discoveries. Whether crafting for personal use or building a sustainable business, the satisfaction of creating beautiful, durable bags that accompany people through daily life represents one of crochet’s most rewarding applications. Start with a simple project, apply these principles intentionally, and allow your expertise to grow organically through practice and observation.

Victoria Collins is a passionate crochet artist, always seeking new ways to turn yarn into art, beauty, and meaning. Driven by creativity and dedication, she combines skill, patience, and curiosity to craft unique pieces, exploring different styles and experimenting with fresh ideas. With a keen eye for detail and innovation, Victoria transforms crochet into a space for expression, continuous learning, and connection with others who share a love for handmade creations.