Introduction
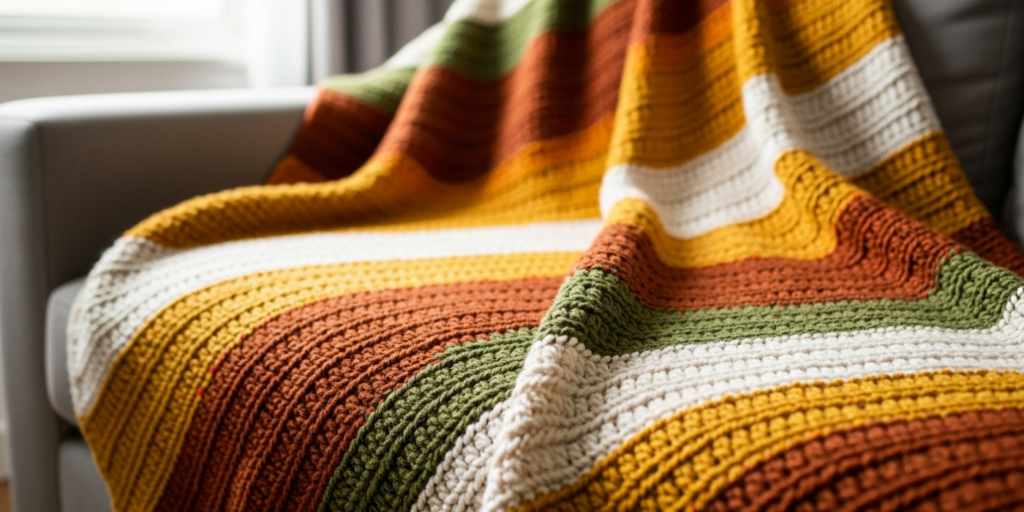
Mastering how to crochet cozy blankets represents one of the most fulfilling journeys in fiber arts. This craft merges therapeutic rhythm with tangible results, producing items that offer warmth, comfort, and personal expression. For beginners, simple patterns remove intimidation barriers, transforming complex-looking projects into achievable goals. Experienced crocheters discover renewed joy in minimalist designs that highlight texture and drape rather than intricate complexity. The accessibility of basic stitches—single crochet, double crochet, and half-double crochet—creates a foundation where creativity flourishes without technical overwhelm. In today’s handmade economy, these blankets hold dual significance: they serve as cherished personal projects while offering viable pathways for small business development. This comprehensive guide delivers actionable instruction for every skill level, emphasizing practical execution over theoretical complexity. We’ll navigate yarn selection nuances, tension management, pattern scaling, and finishing techniques that distinguish amateur work from professional results. By focusing on simplicity as a strength rather than limitation, you’ll develop confidence to create heirloom-quality blankets that provide genuine utility and aesthetic pleasure. Whether crafting for your sofa, a newborn’s nursery, or a cottage industry venture, understanding the principles behind successful blanket construction transforms repetitive motion into meaningful creation. The following sections unpack every element required to execute this timeless craft with competence and creativity.
What This Topic Means for Crochet & Knitting Businesses
The market dynamics surrounding handmade textiles reveal compelling opportunities for artisans specializing in accessible home goods. In many crochet businesses I’ve consulted with, blankets consistently rank among top-selling items due to their universal appeal and perceived value. Unlike garments requiring precise sizing, blankets accommodate creative flexibility while meeting consistent consumer demand for comfort objects. Simple patterns prove particularly advantageous for small-scale entrepreneurs because they reduce production time without sacrificing quality perception. A blanket created with basic stitches allows makers to complete projects faster, improving cash flow while maintaining premium pricing—customers rarely distinguish between complex and simple construction when evaluating coziness and aesthetic appeal. From working with multiple crochet brands, I’ve observed that product lines featuring “beginner-friendly” blankets attract broader customer segments, including gift purchasers who value the story behind handmade items. These pieces also serve as effective gateway products; customers purchasing an affordable throw often return for higher-margin items like custom commissions or pattern downloads. Inventory management simplifies considerably when focusing on versatile patterns requiring minimal specialized materials. Rather than maintaining extensive yarn libraries for complex colorwork, businesses can build cohesive collections using three to five core yarn weights across seasonal color palettes. This approach reduces waste while strengthening brand identity. Furthermore, simple blanket patterns generate valuable content marketing assets—tutorial videos, progress photos, and stitch close-ups—that drive social media engagement without demanding advanced technical skills from creators. For micro-businesses operating with limited production capacity, mastering efficient blanket construction creates sustainable workflow models where quality control remains manageable. The emotional resonance of blankets—associated with comfort, security, and care—also enhances customer loyalty and word-of-mouth referrals, making them strategic products beyond their immediate profit margins.
Why This Strategy Works Especially Well in the Crochet Community
Simple patterns resonate deeply within crochet culture for reasons extending beyond technical accessibility. The craft’s historical roots in practical homemaking established blankets as foundational projects where skill development occurred naturally through repetition. Unlike knitting’s frequent association with intricate lace or garment construction, crochet maintains strong cultural ties to utilitarian textiles where straightforward stitches dominate. This heritage creates inherent community validation for projects prioritizing function over complexity. From observing countless crochet groups and forums, I’ve noted that beginners who start with simple blanket patterns exhibit significantly higher retention rates than those attempting amigurumi or filet crochet immediately. The psychological reward of completing a usable object—however basic—builds crucial confidence that sustains long-term engagement. Additionally, the rhythmic nature of repetitive stitches induces meditative states documented to reduce stress, making blanket projects particularly appealing during periods of collective anxiety. Experienced designers often recommend simple blankets as “skill anchors” during creative slumps; returning to fundamental stitches reconnects makers with tactile joy when complex projects cause frustration. The scalability of basic patterns also supports inclusive participation—crafters with arthritis or limited dexterity successfully complete projects using larger hooks and chunky yarns that would prove challenging in detailed work. Community sharing thrives around these projects because variations emerge organically through color choices and minor stitch substitutions rather than pattern modifications, lowering barriers to participation in swaps and charity drives. Hospital donation programs, for instance, consistently request simple-stitch blankets because uniform construction ensures safety and washability. This practical utility reinforces crochet’s identity as a compassionate craft. Moreover, the visual impact of texture created through basic stitches—like the dimensional quality of moss stitch or the fluid drape of linen stitch—demonstrates that sophistication emerges from execution rather than complexity. When makers master tension control within simple frameworks, their work achieves professional polish that complex patterns sometimes obscure. This principle explains why high-end handmade brands frequently feature minimalist blankets in their collections; the absence of visual noise allows material quality and craftsmanship to take center stage.
Materials, Tools, or Resources Needed
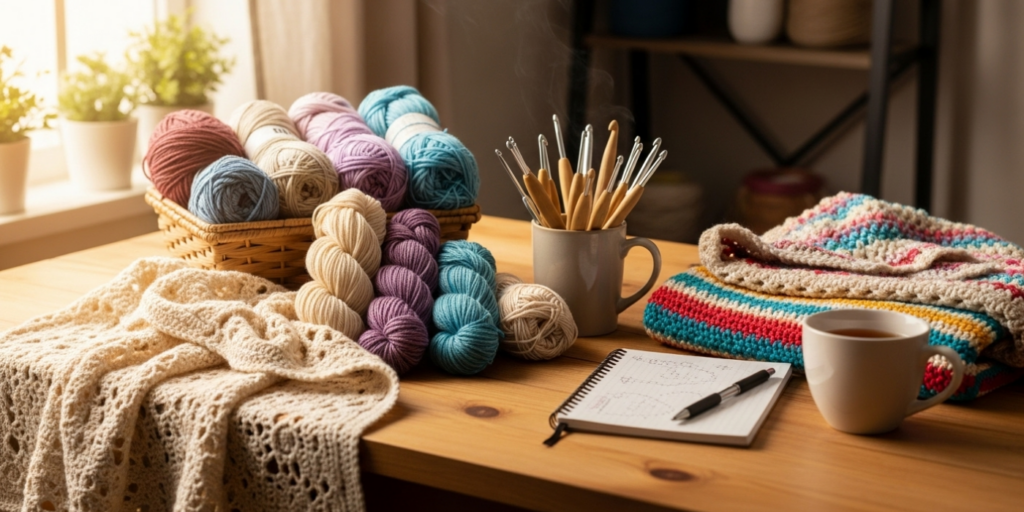
Executing successful blanket projects begins with intentional material selection. While simple patterns minimize technical demands, appropriate tools prevent common frustrations that derail beginners. Your foundational toolkit requires only four essential items, though supplementary resources enhance efficiency. First, select a crochet hook matching your yarn weight—consult the yarn band’s recommendation as your starting point, but recognize that personal tension may require adjustment. Hooks between 5.0mm and 6.5mm (H-8 to K-10.5) prove most versatile for worsted-weight blankets, the ideal starting point for learners. Invest in ergonomic hooks if crocheting sessions exceed thirty minutes; hand fatigue compromises stitch consistency more than beginners anticipate. Second, choose stitch markers—both locking and ring styles serve distinct purposes. Use ring markers to denote row beginnings in continuous rounds or pattern repeats, while locking markers temporarily hold sections during border attachment or color changes. Third, a tapestry needle with a blunt tip and large eye becomes indispensable for weaving ends; attempting this task with sharp needles risks splitting plies and creating visible bumps. Fourth, maintain a flexible measuring tape rather than rigid rulers; draping blankets during measurement requires conforming tools. Supplementary resources worth considering include a row counter (digital or mechanical) for patterns exceeding fifty rows, a project bag with compartmentalized storage to prevent yarn tangling, and a small notebook for recording hook sizes and tension notes specific to each project. Many successful crocheters maintain “swatch journals” where they document yarn-hook combinations with tension samples, creating personalized references that eliminate guesswork on future projects. Avoid over-investing in specialty tools initially; complex accessories often gather dust while fundamental items receive daily use. Remember that quality matters more than quantity—two well-made hooks outperform a drawer full of cheap alternatives that bend or snag yarn. When sourcing materials, prioritize retailers offering return policies on unused yarn; dye lot variations can derail projects if additional skeins don’t match perfectly. Digital resources like Ravelry’s pattern database or YouTube tutorials supplement physical tools but shouldn’t replace hands-on practice. The most critical “tool” remains patience—allowing yourself grace during the learning curve prevents abandoned projects that waste materials more than any initial investment.
Yarn Types and Fiber Considerations
Yarn selection fundamentally determines a blanket’s hand-feel, durability, and appropriate use case. For cozy blankets prioritizing comfort, fiber content deserves more attention than brand name or color. Natural fibers like merino wool and alpaca provide exceptional warmth-to-weight ratios and breathability but require careful washing protocols that may deter gift recipients unfamiliar with hand-care requirements. Cotton and bamboo blends offer machine-washable practicality with beautiful drape, though their lack of elasticity challenges beginners maintaining consistent tension. Acrylic yarns—often dismissed by fiber snobs—deliver remarkable value for blanket projects: affordability enables larger sizes without budget strain, consistent dye lots prevent color-matching headaches, and machine-washability ensures real-world usability. From testing dozens of yarns across client projects, I’ve found that premium acrylics like Bernat Blanket or Lion Brand Wool-Ease Thick & Quick balance softness with stitch definition better than budget alternatives that pill after minimal use. Weight considerations prove equally critical; worsted (medium/4) and bulky (5) weights create substantial blankets without excessive project duration. Avoid super bulky (6) yarns for first attempts—they magnify tension errors and limit stitch options. For baby blankets, prioritize OEKO-TEX certified yarns guaranteeing absence of harmful substances, and select tighter plies that resist unraveling when tiny fingers explore textures. Temperature regulation matters for year-round usability: linen-cotton blends breathe beautifully for summer throws, while wool-acrylic hybrids provide cozy warmth without overheating. Always purchase extra yarn—calculate requirements then add 10-15%—because dye lot variations between production runs create visible stripes if you run short mid-project. Swatching isn’t optional; a 6×6 inch sample washed and dried as the finished blanket will be reveals shrinkage, pilling tendencies, and true drape that ball-band information omits. When sustainability concerns arise, consider recycled cotton blends or ethically sourced wool, but verify certifications since “eco-friendly” claims often lack standardization. Remember that texture affects perceived coziness more than fiber alone; a slightly fuzzy acrylic may feel more inviting than a smooth merino if the recipient prefers tactile softness over temperature regulation. Ultimately, match yarn characteristics to the blanket’s intended recipient and use environment rather than chasing theoretical ideals.
Skill Level Breakdown
Beginner
Beginners should approach blanket projects with realistic expectations about time investment and skill development. Start with worsted-weight yarn and a 5.5mm (I-9) hook—this combination provides clear stitch definition while forgiving minor tension inconsistencies. Limit your first project to a lap blanket (approximately 36×48 inches) rather than overwhelming queen sizes. Master only two stitches initially: single crochet for dense, warm fabric or double crochet for quicker, drapier results. Avoid color changes or complex borders until you’ve completed one full blanket; these elements introduce complications that obscure fundamental skill development. Practice maintaining consistent tension by crocheting a 10×10 inch swatch daily for one week before beginning your blanket—this builds muscle memory more effectively than jumping directly into large projects. Expect your first blanket to take 20-30 hours spread across multiple sessions; rushing leads to frustration when rows curve or edges ruffle. Focus on recognizing the “V” shape of each stitch to maintain accurate counts—losing track mid-row causes frustrating shape distortions. Accept minor imperfections as part of the learning process; even experienced crocheters have slightly uneven edges on personal projects. The primary goal for beginners is completing a functional object while internalizing rhythm and stitch anatomy. Document your journey with progress photos; reviewing these later reveals improvement invisible during the process. Most importantly, choose yarn in a solid, light color—variegated or dark shades hide stitch definition, making error correction nearly impossible for new crocheters.
Intermediate
Intermediate crocheters have mastered basic stitch execution but seek refinement in efficiency and aesthetic control. This level focuses on tension consistency across large surfaces—a common challenge when blanket dimensions amplify minor variations. Experiment with ergonomic hooks if hand fatigue occurs after 45 minutes of continuous work; subtle grip adjustments often resolve tension fluctuations better than conscious effort. Introduce simple texture stitches like moss stitch (alternating single crochet and chain stitches) or linen stitch to create visual interest without complex charts. Practice reading your work—identifying stitches without counting each “V”—to maintain flow during long rows. Intermediate makers should tackle gauge precision: create multiple swatches with different hook sizes to understand how minor adjustments affect drape and size. This skill prevents disappointing size discrepancies after 30 hours of work. Explore color transitions using planned pooling techniques with self-striping yarns rather than frequent cutting/weaving ends. Attempt borders beyond simple single crochet rounds—try a crab stitch (reverse single crochet) for polished edges or picot details for feminine touches. Time management becomes relevant; break large projects into achievable sessions (e.g., “five rows per evening”) to maintain momentum without burnout. Intermediate crafters often benefit from learning foundation stitches that eliminate initial chain limitations, creating more elastic edges ideal for blankets receiving heavy use. Critically evaluate finished projects under natural light to identify subtle inconsistencies invisible under artificial lighting—this develops the discerning eye separating competent crafters from artisans.
Advanced
Advanced crocheters leverage technical mastery to prioritize efficiency and conceptual innovation within simple frameworks. At this level, the challenge shifts from execution to intentionality—every stitch decision serves a functional or aesthetic purpose. Master tension modulation to create intentional texture variations within uniform stitch patterns; slightly tighter stitches at edges prevent curling without borders, while relaxed tension in centers enhances drape. Develop systems for large-project management: implement row counters with milestone rewards, pre-wind all yarn into cakes to prevent mid-project tangling, and document dye lot numbers with project notes. Advanced makers explore yarn substitution science—calculating wraps per inch to match drape characteristics when original yarns become unavailable. Experiment with unconventional materials like t-shirt yarn or recycled sari silk within basic stitch structures to create conversation pieces demonstrating material innovation. Perfect finishing techniques: wet blocking transforms even simple stitches into professional textiles by evening stitches and enhancing drape—this single step elevates handmade blankets to boutique quality. Advanced crafters also develop teaching capacity; articulating why certain techniques work builds deeper understanding than silent execution. Consider designing your own simple patterns by modifying established formulas—adjusting multiple counts to resize projects or combining two basic stitches for original textures. Most significantly, advanced practitioners cultivate project discernment—recognizing when simplicity serves the vision better than complexity. The most coveted handmade blankets often feature impeccable execution of fundamental stitches rather than technical gymnastics, proving mastery lies in restraint as much as capability.
Step-by-Step Guide
Creating a cozy blanket using simple patterns requires methodical execution. This guide details every phase using double crochet—the ideal balance of speed and texture for beginners—though principles apply across stitch types. Always begin with a gauge swatch; skipping this causes 80% of sizing disappointments. Chain 16 stitches using your chosen yarn and recommended hook. Work double crochet in the fourth chain from hook (this counts as first double crochet plus turning chain). Complete one double crochet in each remaining chain. Turn your work. Chain 3 (counts as first double crochet), then work one double crochet in each stitch across. Repeat this row until your swatch measures 4×4 inches unstretched. Measure stitch count across 4 inches horizontally and row count vertically. If measurements differ from pattern specifications, adjust hook size—larger hooks increase size, smaller hooks decrease it—and re-swatch. Never proceed without matching gauge.
Calculate starting chain based on desired width and your gauge. For a 40-inch wide blanket with 12 double crochet stitches per 4 inches (3 stitches per inch), multiply 40 inches by 3 stitches = 120 stitches. Add 3 chains for turning (total 123 chains). Use a counter to avoid miscounting long chains—pause every 20 chains to place a stitch marker. Foundation chains should feel firm but not tight; overly tight chains cause ruffled edges as subsequent rows relax.
Begin Row 1: Yarn over, insert hook into fourth chain from hook, yarn over and pull up a loop (three loops on hook), yarn over and pull through two loops twice to complete first double crochet. Work one double crochet in each remaining chain across. Do not place stitches in the turning chain space. At row end, your stitch count should match your calculated number minus three (the turning chain substitution). Count stitches aloud while learning—missing one stitch compounds across rows, causing noticeable trapezoid shapes.
Turn your work clockwise. Chain 3 tightly against the last stitch to prevent gaps. This chain functions as your first double crochet of Row 2. Work one double crochet in each stitch across, including the top of the turning chain from previous row. Maintain consistent tension by holding yarn between index finger and thumb with slight resistance—not pulling tightly, but providing steady feed. Position your non-hook hand to guide the fabric, preventing twisting that causes diagonal growth.
Continue repeating Row 2 until blanket reaches desired length. For a 50-inch throw with 8 rows per 4 inches (2 rows per inch), work 100 rows total. Use a row counter app or physical counter—mental tracking fails after 30+ rows. Every 10 rows, measure vertically without stretching; adjust row count if growth deviates from target. If edges begin ruffling, you’re adding stitches unintentionally—likely working into the base of the turning chain. If edges pull inward, you’re skipping the last stitch—common when fatigue sets in.
After final row, fasten off by cutting yarn leaving a 6-inch tail. Yarn over and pull tail completely through loop. Weave ends using tapestry needle: thread tail, weave horizontally through back loops of five stitches, change direction vertically through five more, then trim close to fabric. Never knot ends—knots create bumps and loosen over time.
For borders, work single crochet evenly around entire perimeter. Place 3 single crochet stitches in each corner to prevent puckering. Join with slip stitch to first single crochet, chain 1, and work second round if desired for thickness. Fasten off and weave ends. Blocking transforms appearance: submerge finished blanket in lukewarm water with wool wash for 20 minutes. Gently squeeze (never wring) excess water. Lay flat on towels, shape to measurements, and pin edges if needed. Allow 24-48 hours drying time. This process evens stitches, enhances drape, and sets the fabric permanently.
Common Mistakes and How to Avoid Them
Inconsistent tension remains the most pervasive issue undermining blanket quality, manifesting as rippled edges or stiff fabric. This typically stems from psychological factors—beginners often tighten grip when concentrating, then relax during automatic motions. Combat this by practicing “tension checks” every 10 rows: place your work on a flat surface and observe edge behavior. Slight curling is normal for double crochet; severe ruffling indicates added stitches, while pronounced cupping suggests stitch loss. Implement physical reminders: wear a rubber band on your wrist and snap it gently when catching yourself gripping too tightly. Record tension patterns in a journal—many crafters discover their tension loosens after 45 minutes of continuous work, signaling needed breaks.
Miscounting stitches compounds silently until shape distortion becomes irreversible. The turning chain deception causes most errors—beginners forget whether their pattern counts the turning chain as a stitch. Establish a personal rule: always count stitches after completing each row until muscle memory develops. Place locking stitch markers in the first and last stitch of every fifth row as visual checkpoints. When working in dim light, use a headlamp with daylight-balanced LEDs; shadowed stitches become indistinguishable, leading to accidental skips or doubles.
Yarn management errors waste significant time through tangling and dye lot mismatches. Never pull yarn from center pulls while working large projects—the accumulating cake rotation twists working yarn. Instead, place skeins in separate containers (yarn bowls or clean margarine tubs) with yarn exiting through a small hole. Purchase all yarn simultaneously from the same dye lot, verified by matching numbers on labels—not just color names. I’ve witnessed heartbreaking scenarios where crafters completed 90% of blankets only to discover discontinued dye lots with no matching inventory.
Ignoring gauge causes profound disappointment when finished dimensions miss targets by inches. Swatching feels tedious but prevents 30 hours of wasted effort. Crucially, swatch must be washed and dried identically to planned blanket care—many yarns relax significantly after first wash, altering drape and size. Measure swatches on a hard surface with a metal ruler; fabric stretching during measurement creates false confidence.
Border attachment mistakes create puckered edges that ruin otherwise perfect blankets. The fundamental error: working the same number of border stitches as edge stitches. Blanket edges contain more linear space than top/bottom rows due to stitch anatomy. Correct approach: work 3 single crochet stitches in each corner, then calculate edge stitches as 3 per “row space” along sides and 1 per stitch along top/bottom. Practice on a small swatch first—border tension should match body tension, not tighten instinctively.
Advanced Tips and Professional Insights
Professional crocheters employ subtle techniques that transform competent work into exceptional textiles. Master the standing stitch for seamless color changes or border beginnings—this eliminates visible joins and starting tails. To execute: hold new yarn end against fabric back, insert hook where stitch begins, pull loop through to front, complete stitch normally while trapping tail. This method secures tails during creation, reducing finishing time by 40%.
Tension modulation creates intentional texture within uniform patterns. Slightly tighten stitches at blanket edges (first and last three stitches per row) to prevent natural curling without borders. Conversely, relax tension in center sections to enhance drape—particularly valuable for lightweight throws. This requires mindful practice but becomes automatic with awareness.
Strategic stitch placement compensates for human error. When working long rows, intentionally place your “messiest” stitches near center rather than edges—visual inspection focuses on perimeter perfection. Similarly, position color changes at row beginnings where minor inconsistencies hide within turning chains rather than mid-row where they draw attention.
Yarn carry techniques maintain reversibility for blankets used on both sides. When changing colors within rows, work over the unused yarn strand for three stitches before releasing it—this secures the strand without separate weaving. For vertical color blocks, carry yarn up blanket sides within edge stitches, catching it every fourth row to prevent long floats that snag.
Blocking isn’t optional finishing—it’s transformative construction. Wet blocking with careful pinning can correct minor sizing errors (up to 10% adjustment) and dramatically improve drape. For acrylics that resist traditional blocking, use steam blocking with iron held 2 inches above fabric—never direct contact. The moisture and heat reset fiber memory, yielding professional results indistinguishable from woven textiles.
Efficiency systems separate hobbyists from professionals. Pre-count chains onto stitch counters before starting—prevents mid-project counting errors. Wind all yarn into cakes before beginning; mid-project ball winding introduces tension variations. Maintain a project log noting hook size, row count at measurements, and tension observations—this data proves invaluable when recreating successful projects or troubleshooting issues.
Real-World or Hypothetical Examples
Consider Maria, a crafter who launched a micro-business after mastering simple blanket patterns. Starting with donated acrylic yarn, she created lap blankets using only double crochet stitches in soothing color gradients. Her breakthrough came from recognizing that consistent tension—not complex stitches—determined perceived quality. She developed a personal tension gauge: placing her non-hook hand palm-down on the work every 15 rows to check for fabric distortion. Within six months, her Etsy shop featured 30 identical blankets in varying colorways, each taking under 20 hours to complete. Customers praised their “luxurious drape” despite simple construction—a testament to her meticulous blocking process. Maria’s business scaled sustainably because simple patterns allowed her to fulfill custom orders within two weeks without sacrificing day-job responsibilities.
Another example involves community impact: a senior center crochet group adopted simple ripple patterns using donated yarn to create blankets for homeless shelters. The repetitive stitch sequence accommodated varying skill levels—beginners worked straight sections while advanced members handled peak calculations. This inclusive approach produced 200 blankets annually, with the simplicity enabling participants with arthritis to contribute meaningfully using ergonomic hooks and bulky yarn. Shelter staff specifically requested these blankets because uniform construction ensured durability through industrial laundering—a practical advantage complex patterns couldn’t match.
Hypothetically, imagine developing a signature blanket line for boutique hotels. Simple linen stitch patterns in undyed cotton would provide textural sophistication while meeting commercial laundering requirements. The minimal stitch complexity allows production scaling through trained artisans without pattern misinterpretation risks. Hotels value such textiles because consistent appearance across dozens of units creates cohesive guest experiences—something intricate patterns struggle to deliver uniformly. This hypothetical demonstrates how simplicity enables professional applications where reliability trumps decorative complexity.
Customization and Adaptation Ideas
Simple patterns serve as canvases for personalization without technical intimidation. Color sequencing transforms basic stitches into artistic statements—try ombré effects by gradually blending three related shades across 20-row sections, or create geometric impact with bold color blocking every 15 rows. For texture variation within single-color projects, alternate two rows of single crochet with two rows of half-double crochet; the subtle ridge pattern adds visual interest while maintaining beginner-friendly execution.
Size adaptation requires mathematical confidence rather than pattern modification. To resize any multiple-based pattern, first identify the stitch repeat (e.g., “multiples of 2 + 1”). For a pattern requiring multiples of 3 + 2, desired width of 50 inches with gauge of 4 stitches per inch calculates as (50 x 4) = 200 stitches. Divide 200 by 3 = 66.66 repeats. Round to 66 repeats (198 stitches) then add 2 = 200 starting chains. This method works universally across stitch patterns.
Functional adaptations enhance usability: incorporate i-cord edging by working three foundation single crochet stitches along one edge during final border round, then crocheting i-cord separately and sewing it on for a tailored finish. For weighted blankets, pocket channels worked into every tenth row accommodate poly pellets—simple half-double crochet rows create secure pockets without complex construction. Baby blankets benefit from integrated teething corners: work a 3-inch square of tight single crochet in food-grade silicone yarn at one corner during border attachment.
Seasonal adaptations maximize project relevance. Lightweight cotton blankets using mesh stitch patterns provide summer comfort, while wool-acrylic blends in dense single crochet create winter warmth. Consider recipient lifestyles—machine-washable acrylics suit college students, while delicate merino suits primary residences with gentle laundering routines. These thoughtful adaptations demonstrate craftsmanship beyond technical execution.
Care, Maintenance, or Best Practices
Proper care preserves handmade blankets for generations while maintaining their cozy integrity. Always check yarn labels for specific instructions, but general principles apply universally. Machine washing requires front-loading machines on gentle cycles with cold water and mild detergent—top loaders’ agitators stretch and distort stitches. Place blankets in mesh laundry bags to prevent snagging during agitation. Never use fabric softeners; their coatings reduce fiber absorbency and accelerate pilling. For drying, lay flat on clean towels away from direct heat or sunlight—hanging stretches wet weight dramatically, while dryers cause shrinkage even on air-fluff settings.
Stain treatment demands immediate action with cold water blotting—never rub, which grinds particles deeper. For protein-based stains (food, blood), use enzyme cleaners specifically formulated for wool if applicable. Test cleaners on hidden areas first; some discolor light yarns. Preventative care includes rotating blanket usage—frequent sitting areas develop wear patterns that become permanent. Store folded with acid-free tissue paper in breathable cotton bags; plastic containers trap moisture causing mildew.
Long-term maintenance involves periodic refreshing: after 10+ washes, blankets may lose softness. Restore hand-feel by adding 1/4 cup white vinegar to final rinse cycle—it neutralizes detergent residue without coating fibers. For acrylics developing static, lightly mist with water before folding. Repair minor pulls immediately by gently working fibers back into place with a tapestry needle—delayed attention allows small issues to become irreversible damage.
Ethical care extends to environmental responsibility. Wash only when necessary—spot clean minor soiling to conserve water and reduce fiber stress. When blankets reach end-of-life, repurpose rather than discard: cut into cleaning rags, pet bedding, or quilt patches. This mindfulness honors the labor invested in creation while aligning with sustainable values increasingly important to handmade consumers.
Monetization Opportunities
Monetizing blanket-making skills requires strategic positioning that respects craft integrity while building sustainable income streams. Selling finished blankets remains viable but demands pricing literacy—calculate material costs plus hourly rate (minimum $15-20/hour for skilled labor), then add 30% for overhead. A 40×50 inch blanket requiring $25 yarn and 20 hours should retail $345 minimum—undervaluing devalues the entire handmade economy. Focus on niche markets: weighted blankets for anxiety relief, temperature-regulating throws for medical conditions, or culturally significant patterns for diaspora communities command premium pricing justified by specialized knowledge.
Pattern design offers scalable income with minimal ongoing labor. Successful designers structure patterns with exceptional clarity: include right- and left-handed photo tutorials, video links for complex steps, and yarn substitution guides. Price digital patterns between $6-12 based on complexity—simple blankets justify $6-8 while including customization options warrants $10-12. Platforms like Ravelry and Etsy provide established audiences, but building an email list enables direct sales during platform algorithm changes.
Teaching generates reliable income while reinforcing personal skills. Offer structured workshops—beginner blanket classes fill consistently because the project delivers tangible results within 3-4 sessions. Charge $40-60 per student for 3-hour workshops including materials, or $120-180 for multi-session series. Libraries, community centers, and yarn shops often co-host for venue access. Online courses require higher initial investment but provide passive income; focus on specific pain points like “tension mastery for blankets” rather than generic introductions.
Content creation builds authority that supports all monetization streams. Document your process authentically—viewers connect with genuine struggle and triumph more than polished perfection. YouTube channels focusing on blanket-specific techniques (e.g., “joining yarn without knots”) attract dedicated audiences. Monetize through AdSense after meeting platform requirements, but prioritize building community that supports pattern sales and workshops. Remember that educational content must avoid medical claims (“this blanket cures insomnia”) to comply with advertising policies.
Collaborations with yarn companies provide material support and exposure. Approach brands whose values align with your work—submit project proposals demonstrating how your blanket designs showcase their yarns’ strengths. Successful collaborations often begin with unsolicited but professionally photographed samples sent with concise pitches. Never work exclusively for product exchange; established makers receive both product and payment for promotional work.
Frequently Asked Questions
What is the easiest stitch for a beginner blanket?
Single crochet produces the densest, warmest fabric with minimal learning curve—each stitch is worked individually with clear visual definition. Double crochet works faster for larger blankets but requires managing taller stitches that beginners sometimes twist. For absolute beginners, I recommend starting with single crochet in worsted-weight yarn using a 5.5mm hook; the slower pace builds muscle memory more effectively than rushing through double crochet rows.
How much yarn do I need for a throw blanket?
Yarn requirements depend on weight and blanket dimensions. For a standard 50×60 inch throw in worsted weight (category 4), plan for 1,800-2,200 yards. Bulky weight (category 5) requires 1,200-1,500 yards for the same size. Always purchase 10-15% extra to account for tension variations and dye lot matching. Calculate precisely by creating a gauge swatch, measuring yards used per square inch, then multiplying by total blanket area.
Why are my blanket edges curling?
Curling typically indicates tension inconsistency—tighter stitches at edges pull fabric inward. This commonly occurs when beginners subconsciously tighten grip at row beginnings/endings. Solution: consciously relax hand tension during first/last three stitches of each row. For existing curling, blocking often corrects mild cases. Severe curling may require adding a border with slightly increased stitch counts at edges to counteract pull.
Can I make a blanket without turning my work?
Yes—continuous rounds eliminate seams and create spiral effects. Start with a foundation ring, work stitches in continuous spirals without joining rounds. Use a stitch marker to track round beginnings. This method prevents ridge lines from turning chains but requires careful stitch counting since visual row markers disappear. Best suited for experienced beginners comfortable with stitch anatomy.
How do I join new yarn without knots?
The Russian join creates invisible, secure connections without knots or weaving tails later. Split plies of both yarn ends using a tapestry needle, thread one end through the other’s hollow core for 2-3 inches, then pull snug. This interlocks fibers mechanically. For non-splittable yarns, overlap ends for 6 inches and crochet over both strands for 3-4 stitches before dropping the old strand—secure the tail later during finishing.
What hook size should I use for chunky yarn?
Chunky yarn (category 5) typically recommends 6.5-9mm hooks (K-10.5 to M-13). Start with the ball band suggestion, but adjust based on desired drape: larger hooks create airier fabric ideal for lightweight throws, while smaller hooks yield denser, warmer textiles. Always swatch—personal tension varies significantly, and the “right” hook produces fabric that drapes comfortably when wrapped around your shoulders during testing.
Conclusion
Crocheting cozy blankets with simple patterns offers a profound entry point into fiber arts where accessibility and depth coexist harmoniously. The journey from first chain to finished textile builds not only tangible skills but also mindfulness and creative confidence. Remember that mastery emerges through consistent practice within foundational techniques rather than chasing complexity—some of the most cherished blankets in my collection feature nothing beyond perfectly executed double crochet. As you progress, prioritize tension awareness and finishing precision over stitch variety; these elements distinguish memorable handmade objects from disposable crafts. Approach each project as both personal expression and skill development opportunity—document your process, celebrate incremental improvements, and extend grace during inevitable learning curves. The blankets you create will carry stories beyond their stitches: hours of therapeutic rhythm, problem-solving triumphs, and generosity when gifted. For those exploring business applications, remember that authenticity resonates louder than perfection—customers connect with the human touch evident in slightly uneven edges more than machine-like uniformity. Begin your next project with intentionality: select yarn that delights your senses, choose a pattern aligning with current skills, and commit to completing the piece regardless of minor imperfections. In doing so, you honor both the craft’s heritage and its evolving future. The world needs more handmade warmth—your contribution matters.

Victoria Collins is a passionate crochet artist, always seeking new ways to turn yarn into art, beauty, and meaning. Driven by creativity and dedication, she combines skill, patience, and curiosity to craft unique pieces, exploring different styles and experimenting with fresh ideas. With a keen eye for detail and innovation, Victoria transforms crochet into a space for expression, continuous learning, and connection with others who share a love for handmade creations.